
Foundation of Cybersecurity: Period 1
*********
 Due Date: Friday September 9, 2022
Open House
Objectives:
Build an invitation for your family to
come to Klein Collins open house.

We will learn basic windows technique.
We will learn how to use paint instead
photoshop to create our invitation in less than 10 minutes.

Click on this link and follow the instructions.

The outline below is the steps taken in the video.

You will need to sign into skyward.
Go to your schedule.
Click on the upper right corner and
expand the screen to full size.
Click 2 times on Ctrl key and the plus key at the same time.
This will enlarge the screen by 40%.
Your schedule should
cover 90% of your screen

Click on the search icon on the lower
left corner of windows.
Type Paint.
Hit enter.

Click on the search icon on the lower
left corner of windows.
Type Paint.
Hit enter.

You should have 2 paint screens open.

Next return to your skyward schedule.

Hit the print screen button on your keyboard.
(upper right side of the keyboard)
Alt-Tab over to one of the blank paint screens.
Hit keyboard button Ctrl V.
This will paste your schedule
onto the paint.
Do not trim or do anything on paint at this point.

Go to your school e-mail.
(My e-mail account will look different from yours)
You should have received an e-mail from Mr. Cusack
with a text document attached.
Download the text document.
Open the text document with notepad.
Make two text changes to the
Document.

Make a change to the line that says:
"The food truck gets here at 5:30 AM"
Change the time to 5:30 PM.

Next go down to the line that says:
Your Name
Change it to your name.

Next Hit the screen print button.
Alt-Tab over to your other blank paint session.
Hit ctrl V to paste.
Next put a red square around your note.
Next select just the area outside the
red square.
Cut it.
At the top of paint, click File > new.
Do not save it.
Next shrink the white space to nothing.
Next Hit the keyboard Ctrl V
to paste your image of my words in notepad.
Click cntl A, then cntl C.

Next move over to the paint session that
contains your schedule.
Hit the keyboard Ctrl V.
This will paste the note on top
of your schedule.
Move to the second column Term 2
Make sure that the column Term 1
has not been covered up.
Now trim all the areas away except the
Periods and times, column Term 1, and your note.

Save the file as PX_lastname_openhouse.

E-mail it to Mr. Cusack.
Your subject should be "Open House"

Pick up your paper that I print.

Take it home, get you family to sign it.
They can deliver it to me during open house.
Or you can bring it back to me at school.

Next take your file and drop it off into
google classroom.
*********
*********
*********
*********
*********
Due Date: Friday September 9, 2022
Lesson 8
Overview
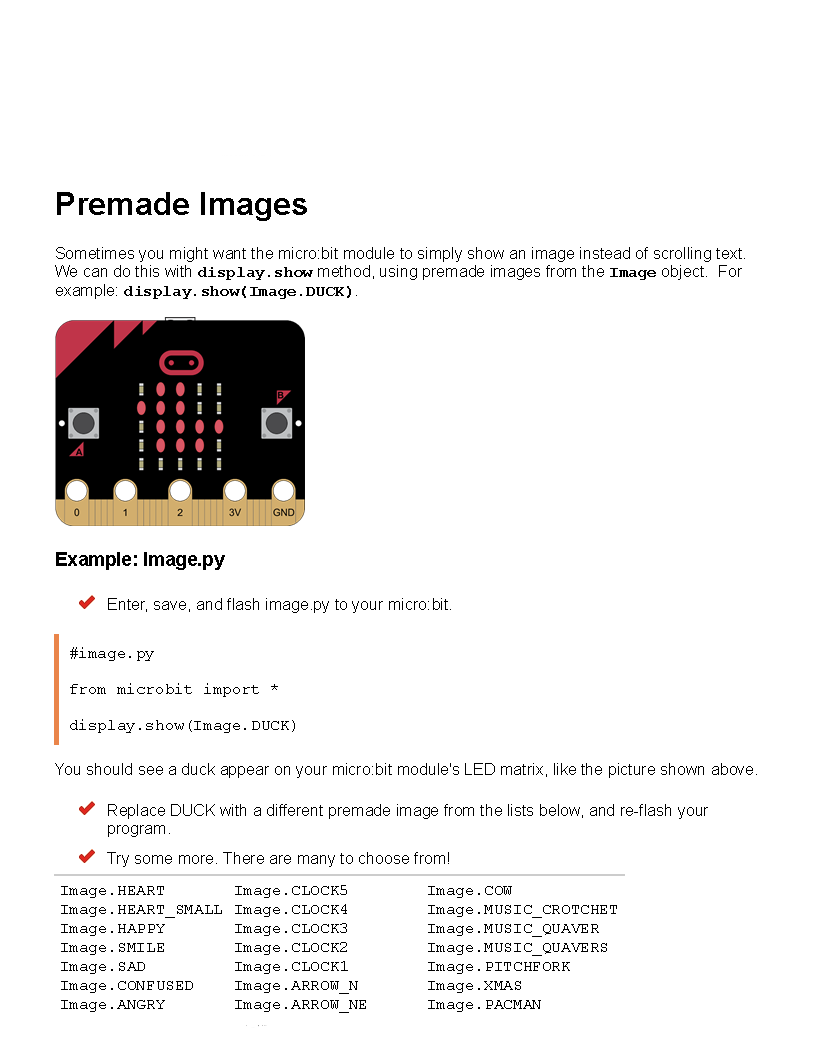
In this lesson, students learn about all the images available
for the microbit.
Objectives
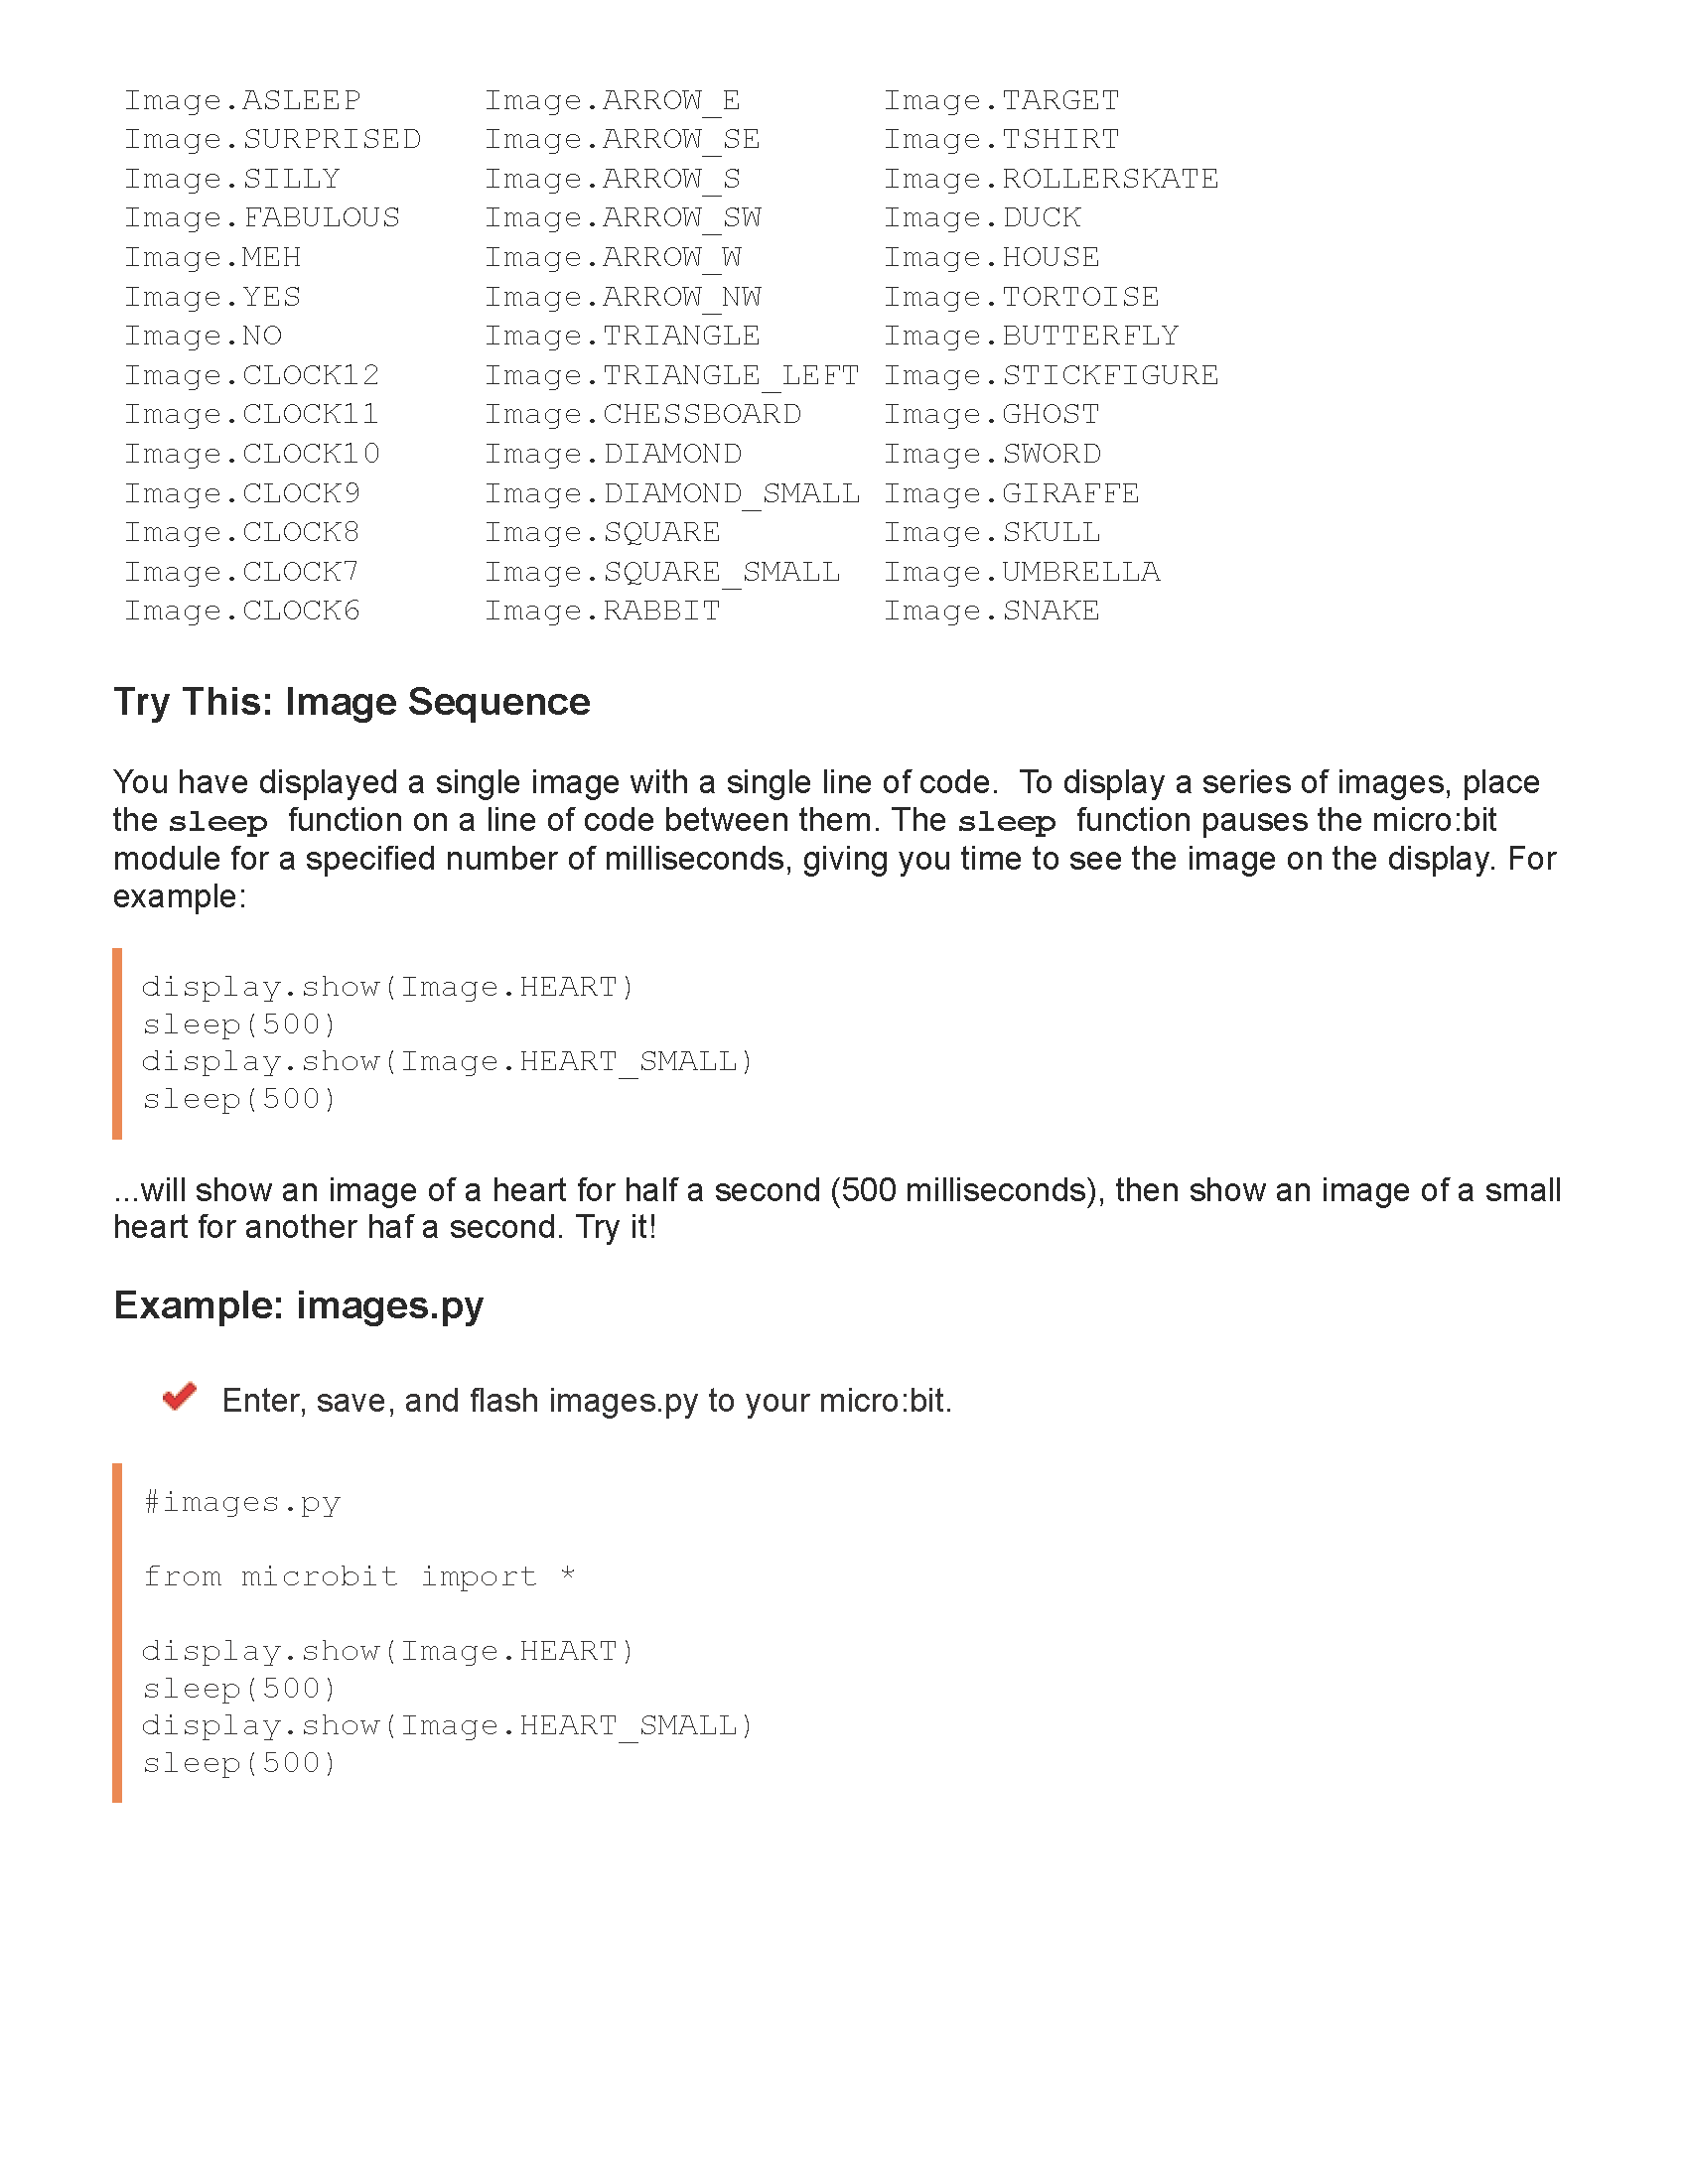
You will need to use images below in your programs.
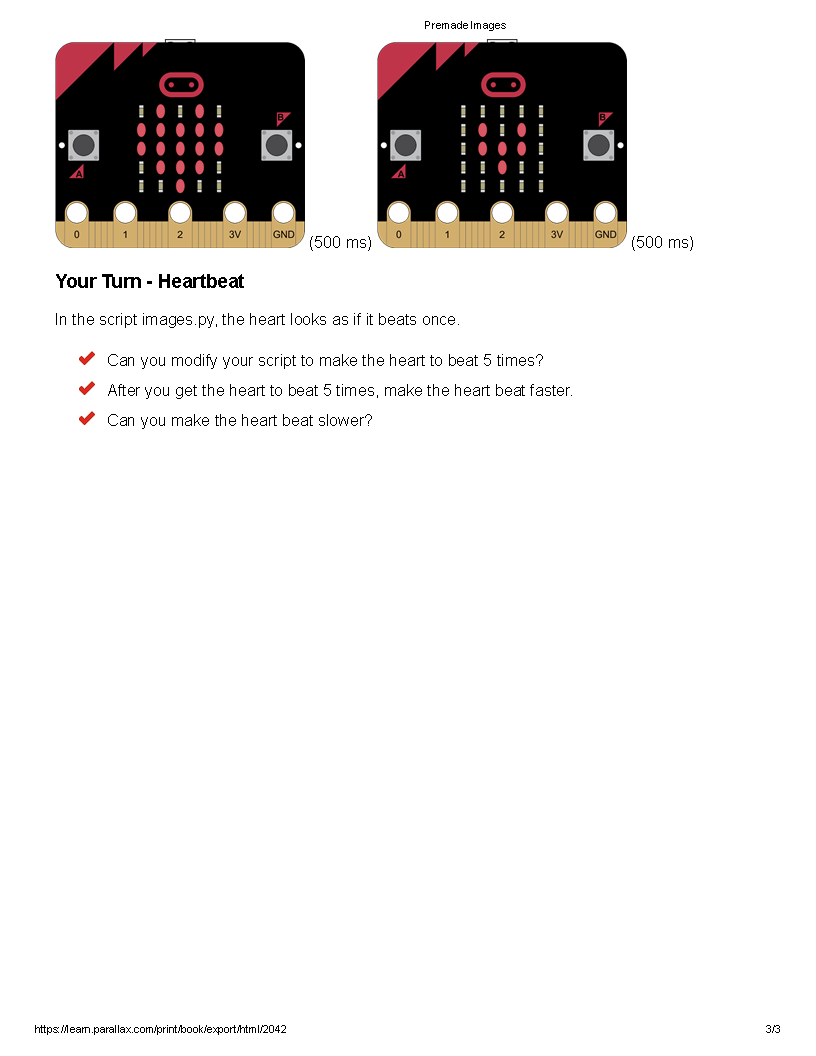
You will need to animate them from
the large version to the small version.
HEART
HEART_SMALL
TRIANGLE
TRIANGLE_LEFT
DIAMOND
DIAMOND_SMALL
SQUARE
SQUARE_SMALL
ARROW_N
ARROW_NE
ARROW_E
ARROW_SE
ARROW_SW
ARROW_W
ARROW_NW
You will need to time delay to the see the transistion.
Make it interesting.
Materials
• micro:bit and micro-USB cord
• Computer with access to the internet
Click here to check in and check out your Micro:Bit
Click here to launch the micro:bit python interpreter.
 You will be dropping off 2 files into google classroom.
Your file names will be:
PX_lastname_Animation.hex
PX_lastname_Animation.py
*********
Due Date: Friday September 9, 2022
Lesson 9
Overview
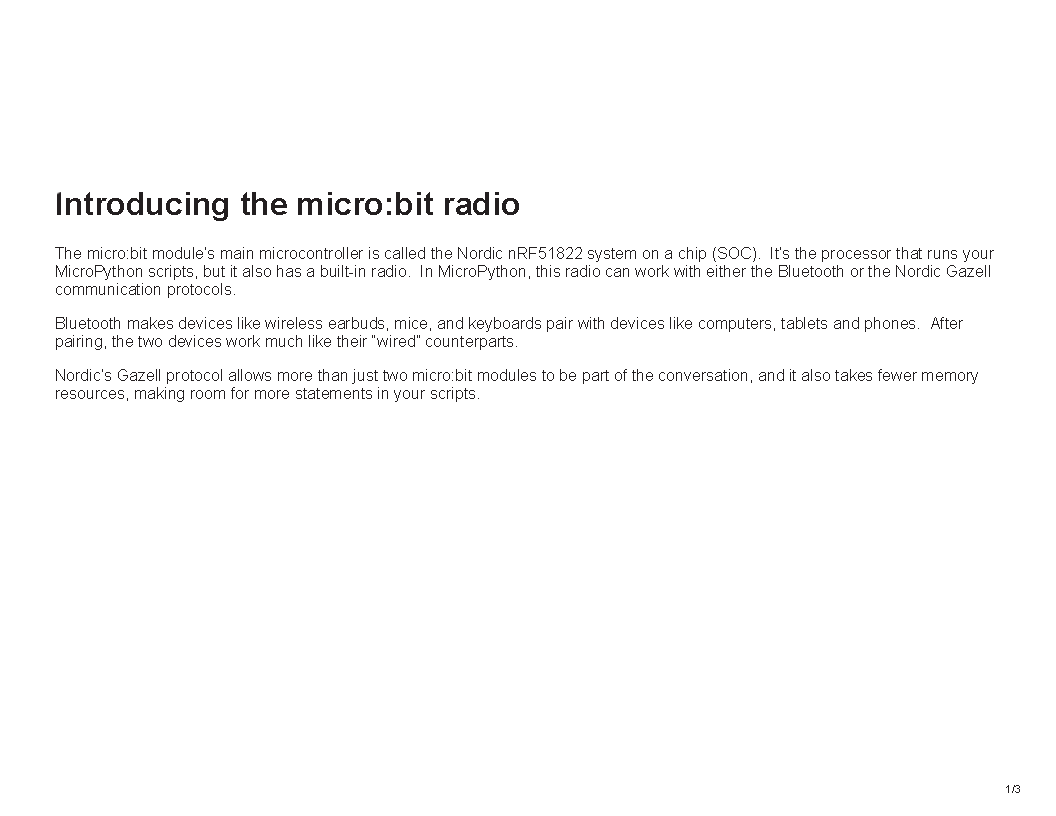
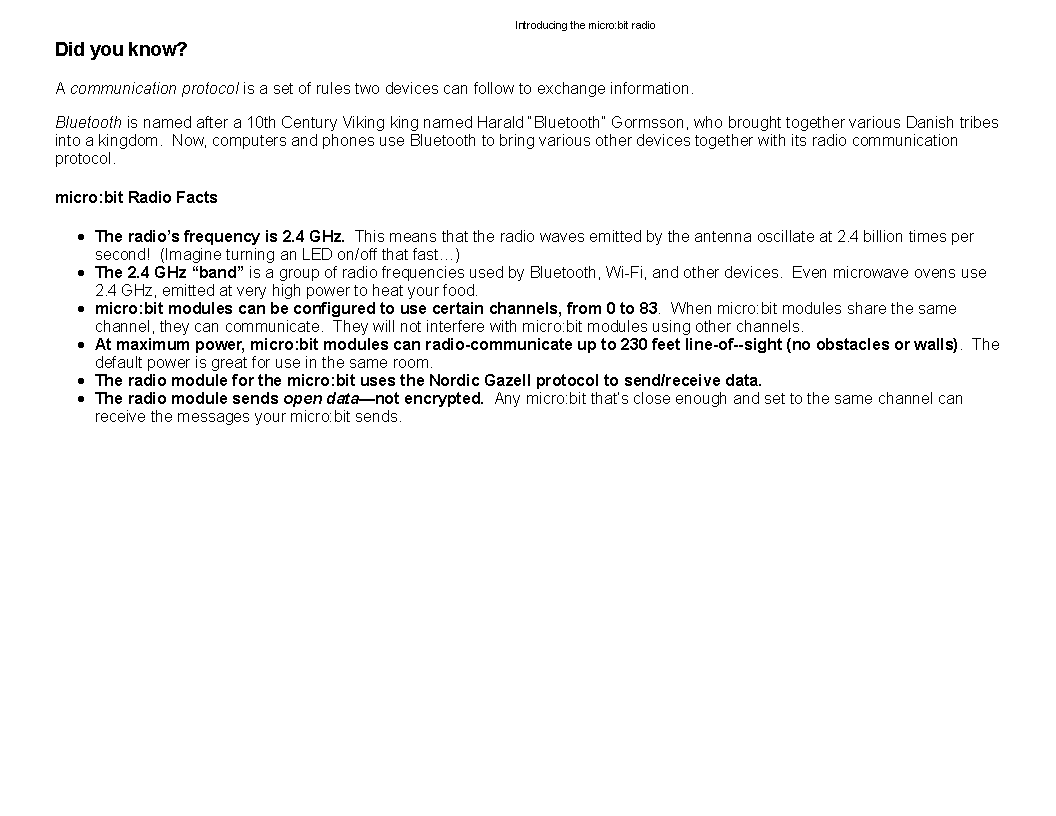
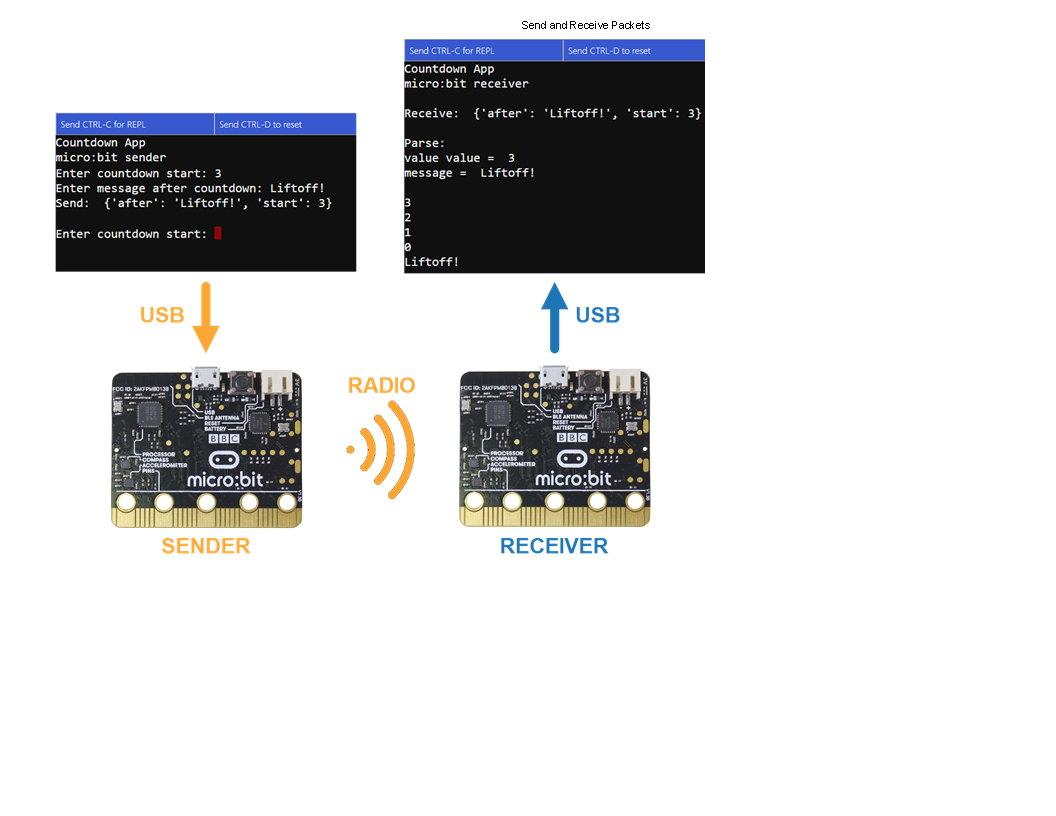
In this lesson, students learn about using the micro bit radio.
Objectives
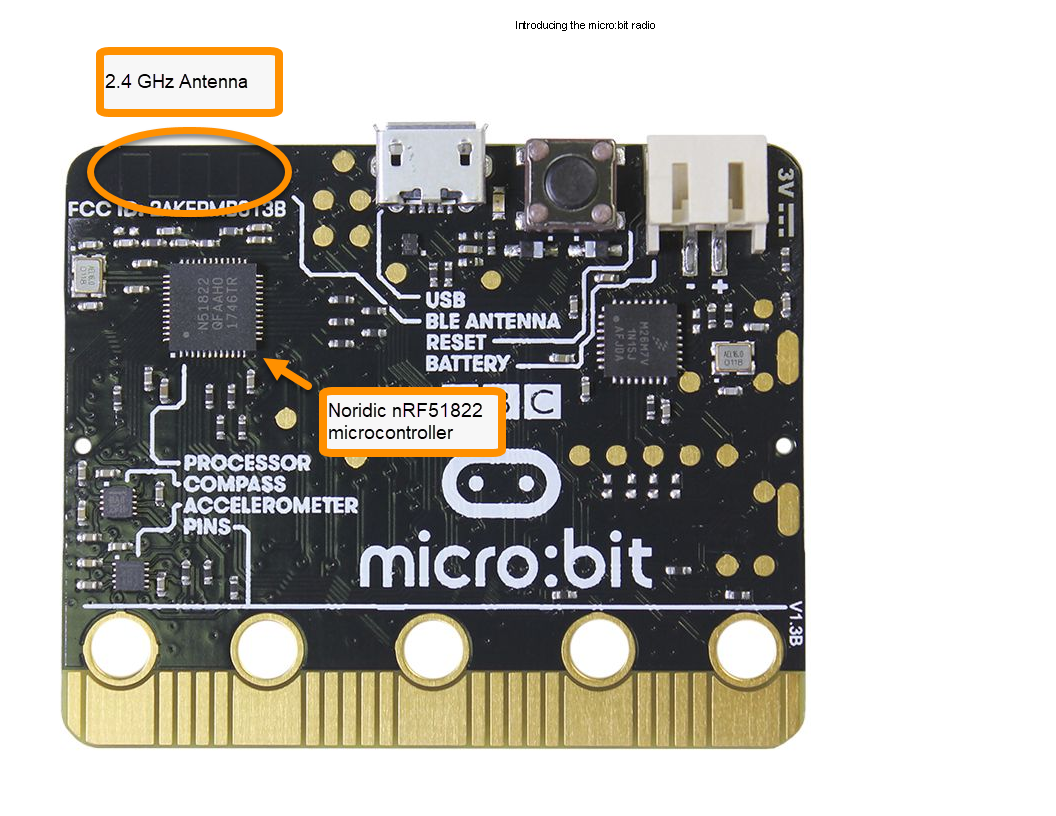
identify part of the micro:bit that has the radio.
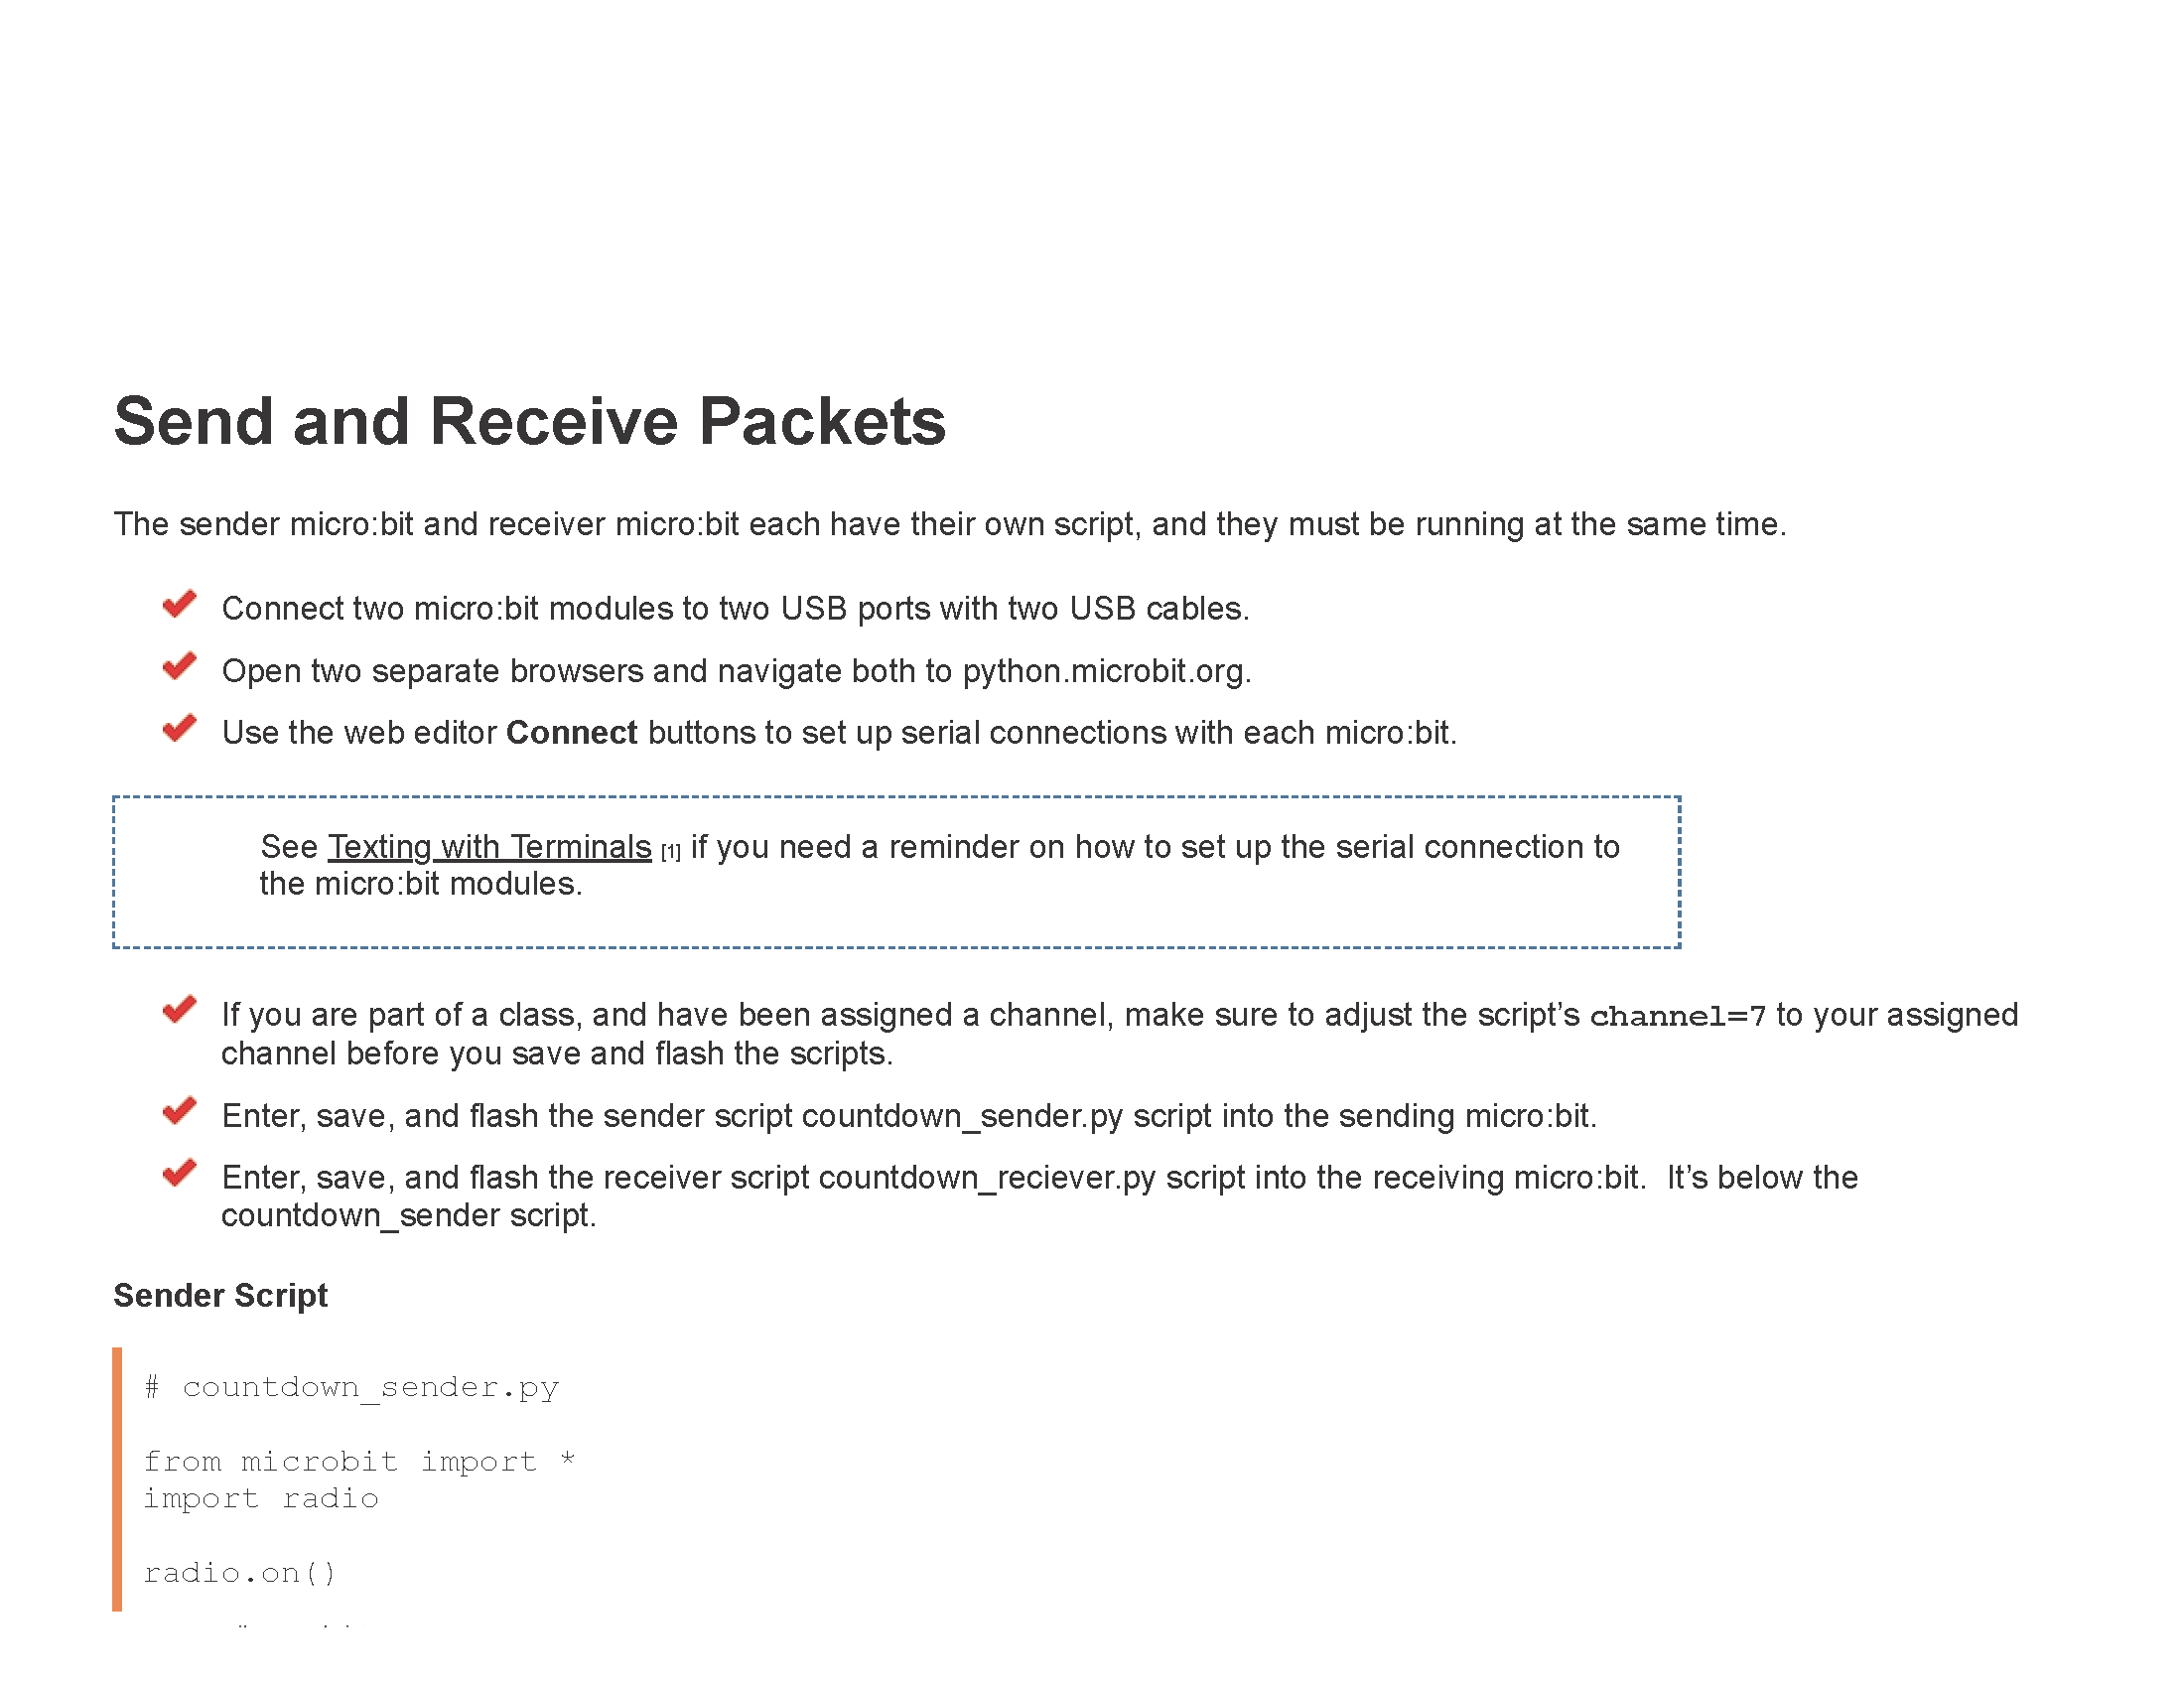
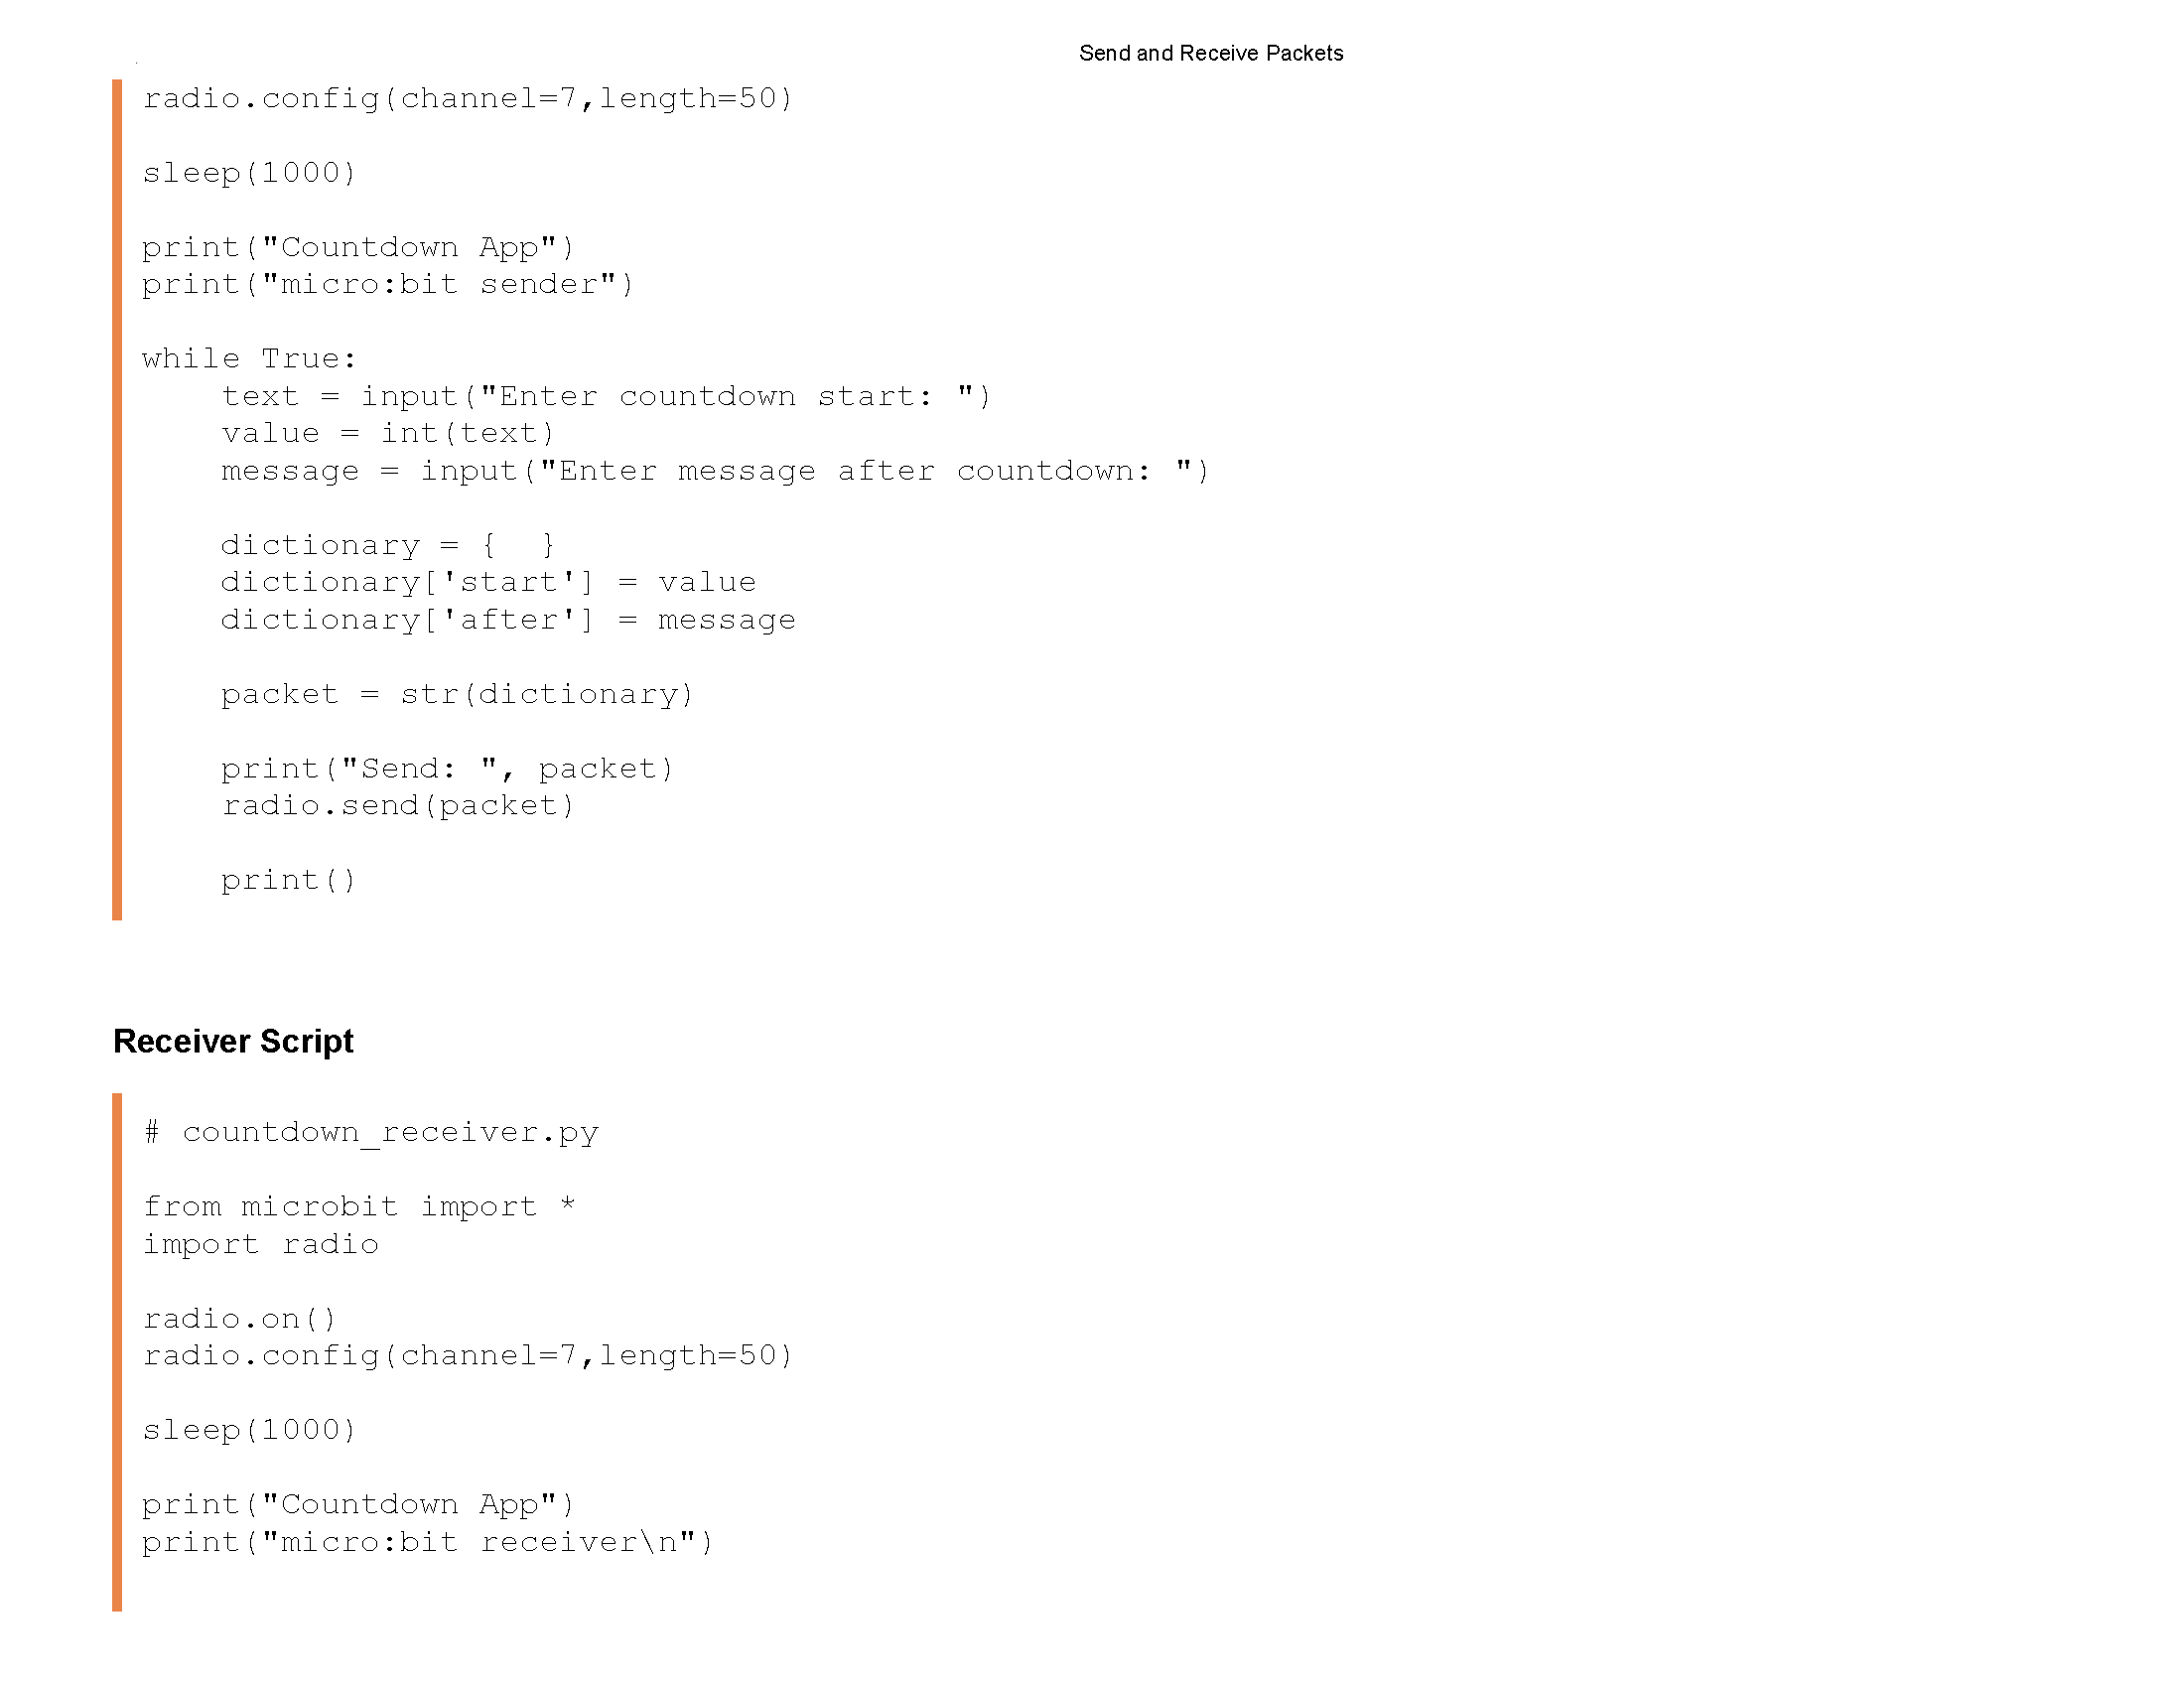
code a program to allow communications between the micro:bits
Materials
• micro:bit and micro-USB cord
• Computer with access to the internet
Click here to check in and check out your Micro:Bit
Click here to launch the micro:bit python interpreter.
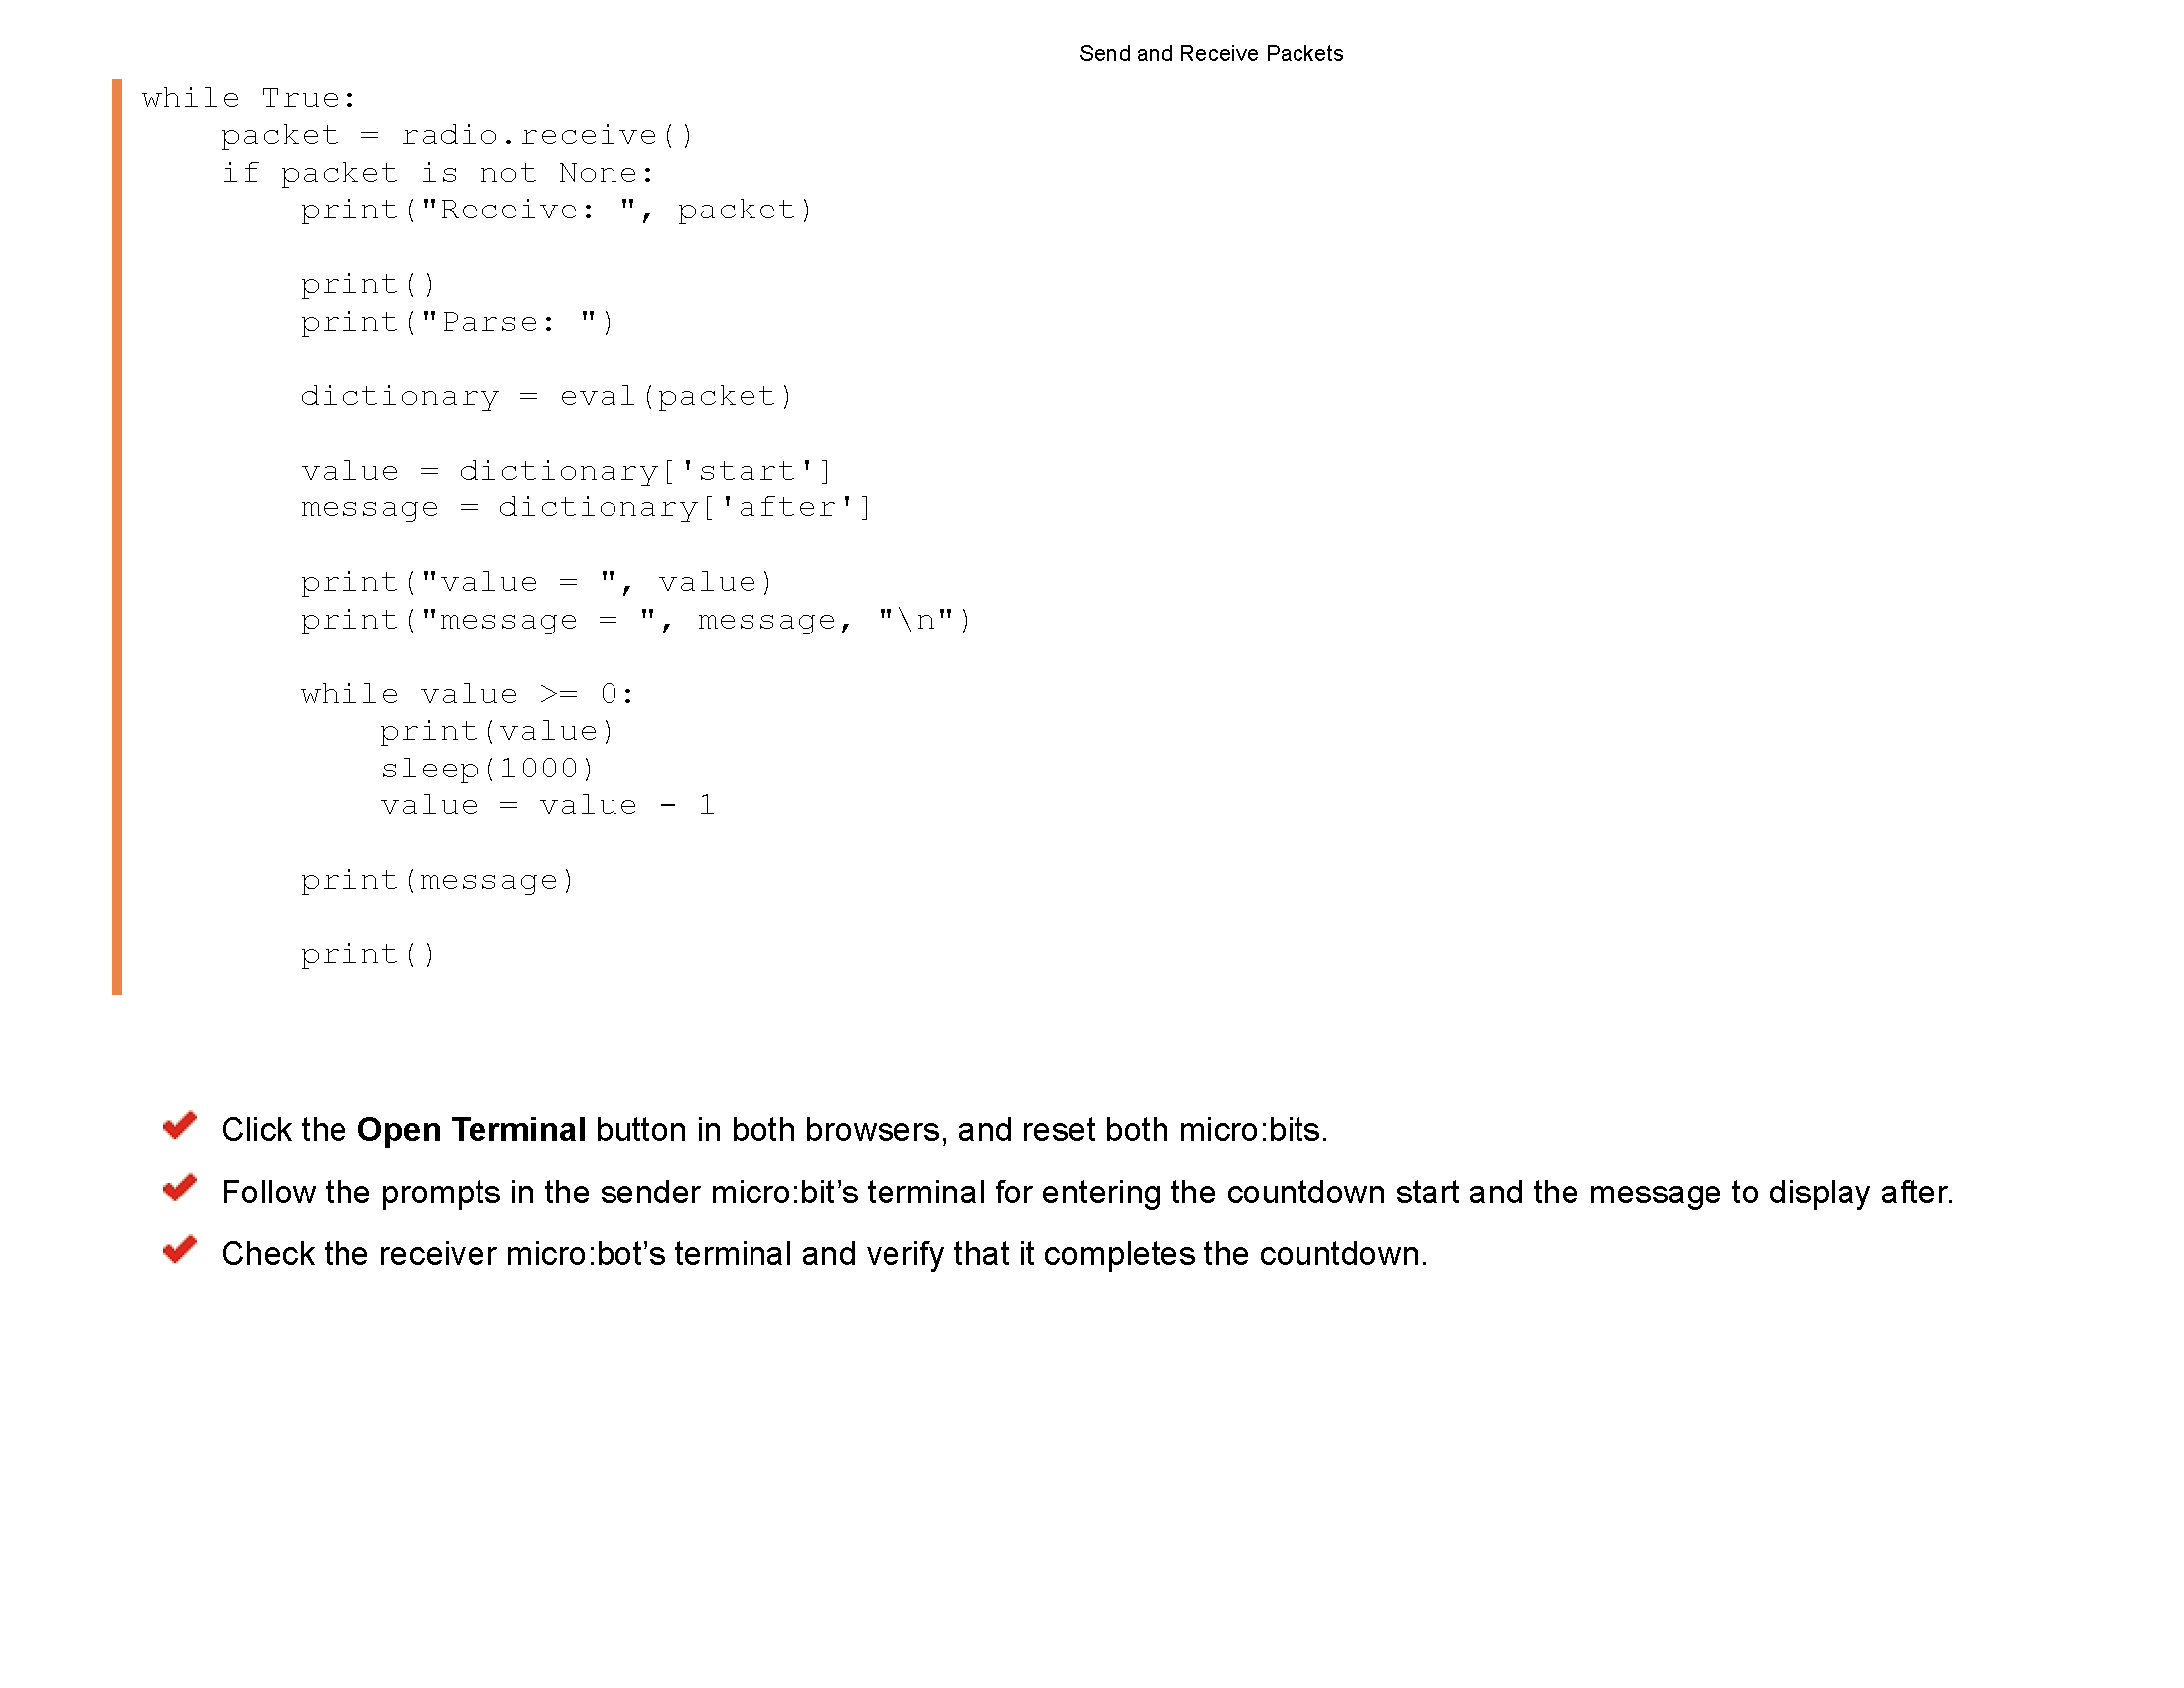
Mr. Cusack will lecture and show you how to work with 2 micro:bits.
Be sure to look at the first part and tell Mr. Cusack about the radio.
What type of antenna does the micro:bit have?
What type of RF processor does your micro:bit have?
 You will be dropping off 2 files into google classroom.
Your file names will be:
PX_lastname_RadioSender.hex
PX_lastname_RadioSender.py
PX_lastname_RadioReciever.hex
PX_lastname_RadioReciever.py
*********
Due Date: Friday September 9, 2022

Lesson 10

Overview
In this lesson, students review the hints and
the video below to create a program
that works the way my video shows.

Objectives
You will need to time delay to the see the transistion.
See if you can match my timing.

Instruction and resources:
Partial copy of the source code below:
# Add your Python code here. E.g.
from microbit import *

# Show a heart and then count on a clock.
# You will need to figure out what commands
# are missing from the code below.
# See my video to figure out the missing commands
# and timing of these display of each image.

sleep(5000)

while True:
    display.show(Image.HEART)
    sleep(???)
    display.show(Image.HEART_SMALL)
    sleep(???)
    ...
    display.show(Image.CLOCK1)
    sleep(????)
    display.show(Image.CLOCK2)
    sleep(????)
    ...
    display.show(Image.CLOCK7)
    sleep(????)
    ...
    display.show(Image.CLOCK12)
    sleep(????)

Click here and watch the video.

Your program should run like mine.

When you are done, Mr. Cusack has to review it.

Materials
• micro:bit and micro-USB cord
• Computer with access to the internet

Click here to check in and check out your Micro:Bit

Click here to launch the micro:bit python interpreter.

You will be dropping off 2 files into google classroom.
Your file names will be:
PX_lastname_Mystery.hex
PX_lastname_Mystery.py


 You will be dropping off 2 files into google classroom.
Your file names will be:
PX_lastname_Animation.hex
PX_lastname_Animation.py


 You will be dropping off 2 files into google classroom.
Your file names will be:
PX_lastname_RadioSender.hex
PX_lastname_RadioSender.py
PX_lastname_RadioReciever.hex
PX_lastname_RadioReciever.py